Zim Photography Blog

Photo Tip #18: More on lenses

Posted: 01 December 2010 . / Categories: Photo Tips


After re-reading Photo tip #15, understanding lenses. I realized there was a missing component in my post. When buying a point and shoot camera or a lens, you need to pay attention to the maximum aperture opening. The aperture is the opening inside the lens that allows light to pass through. You need one that has the largest opening you can possibly get (which means a smaller number). Apertures are referred to as F/stops. So the smaller the opening the better off you are, why? Because it means you are able to gather more light in low light settings, which means it’s easier for you to shoot in low light settings. So try to buy cameras or lenses with apertures with smaller numbers than f/2.8 if you can. But remember this also means the equipment is going to get larger as well (generally speaking).


Photo Tip #17: Buying a Compact Digital Camera.

Posted: 04 November 2010 . / Categories: Photo Tips


For me the reason for buying a small point and shoot camera is because it is small and  you can point and shoot it easily. I have come to discover (over the past 20 years) that when someone takes my advice and buys a small easy to use camera, they are eternally happy with it because they tend to take more pictures and they have more fun with their camera. Below are some of the things you should look for when you are buying one of these point and shoot cameras.

Many of the answers to these questions have been answered in my previous Photo Tip posts, so I will point you to them when appropriate.

1.  It should be small and compact. There are a variety of cameras on the market that are about the size of an Altoids can these days. I think this is a good measure because much bigger and you are less likely to take it with you everywhere you go, less likely to use it and less likely to be happy with it.

2. It should be easy to use. In order for camera manufacturers to fit their cameras into an Altoids can often times the buttons can get rather small. This IS the compromise you will have to make, but there are definitely some that are smaller than others. Before you make a final decision on a camera, go to the store and actually touch and feel the camera to make sure that A. the buttons are big enough for you, B. that you can read the labels on the camera and C. that it is actually not so small as to be difficult to stabilize.

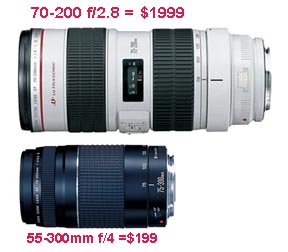
3. What kind of optics should you go with it? In brief the shorter/wider the lens the better off you will be. Trust me on this. Please read this blog posts. “Understanding Lenses”

4. View finder or no view finder? Most manufacturers are slowly but surely moving towards eliminating the view finder on compact point and shoot cameras in favor of  the live view on the LCD screen. When I am shooting with my DSLR there are only select times when I will use the live view on the LCD screen to create an image. Why? because my camera is big and it’s difficult to stabilize the camera for the shot I want. I also like the tunnel vision I get when I’m looking through the viewfinder as well (this also helps me compose my image). On the other hand the viewfinders offered on a compact point and shoot is so small that they too are difficult to use. When I’m shooting with a small camera, I usually favor the LCD screen. I think the days of the view finder on these little cameras are numbered. The drawback of an LCD screen is that manufacturers have not been able to overcome the glare issue when it is used outside in bright daylight (but they have gotten better), so without a viewfinder you may find it difficult to see what you are doing under these conditions. Also, by having a viewfinder you can turn off the LCD screen saving your battery power and be more discrete about what  you are shooting. 

5. How big is the LCD screen? Obviously the size of the LCD screen is limited by the overall size of the camera. But I believe bigger is better. It is also useful to have the option to change the brightness of the screen as well as turning it off (even if you do not have a view finder). What about the new technology of touch screens? welllll, honestly I’m not enamored with the idea. I think it’s just a bit too slow to get to the menu items I really want to get to. Let’s face it, you are going to get your camera, set it up and once very blue moon you will need to change that setting; and when you want/need to do that you want to change it fast! IMHO, touch screens make you scroll and scroll and scroll to make simple changes. I’m just not a fan. You will have to use your own judgment on this.

Other features worthy of mention:

6. Weather/Waterproof: I love the idea of a waterproof camera! Who wouldn’t? But not all are created equal, many have high leakage rates. One way to figure out what the failure rate of any piece of electronics is to read the reviews of other buyers. For instance, last year I really wanted to buy a waterproof camcorder, but nearly 23% of all on-line reviewers seemed to report problems and leakage with that particular camera. (the manufacturer has since pulled the plug on this product). I believe the easiest way to tell the failure rate of a product s by simply looking at the percentage of reviewers rating a product with 2 stars or less. The success rate of a product is in the percentage of 4 & 5 stars. After many years of buying too much electronic equipment, I feel that an acceptable failure rate of a piece of equipment is less than 10%, rarely do I see less than 5%. Speaking of on-line reviews, the same product above, got about 4-5 star rating from “professional” reviewers. But to test the camera those guys put it in a bucket of water for a few minute and then gave it a thumbs up. Reviews from actual customers usually mean that the person jumped into a swimming pool for a while. Lastly, I know there are always those who are unhappy with everything, but I also look at bad reviews looking for this: What is the customer service attitude of the manufacturer? With the product above? Customers reported incredibly bad responses from the manufacturer over and over again. With over a 20% failure rate, very poor customer service, I decided against buying the camera.

7. Video: I love this this feature on a point and shoot. Get HD if you can. I think you’ll enjoy using it. It’s just fun to shoot a video sometimes. But you will need more memory to do this. Read this blog: “I like Chips”

8. Image Stabilization & Face Detection:  also known as IS. Many manufacturers are starting to make this a standard feature on their cameras. I think it’s worth the money. What is it? Image Stabilization is just that, it helps to stabilize your image. Whenever you are shooting in low light and you have a slow shutter speed with no flash you are more likely to move your camera around, IS will help counter this. As a matter of fact it helps counter all hand shake. Be careful though, it should be turned off when you are using a tripod. There is also a technology called Face Detection. Since most amateur photographers like to photograph people, they also want the people are in focus too! duh. Manufacturers have come up with a nifty system that automatically detects faces in your photo and attempts to focus on that! How cool is that? I like it, I think the technology works well.

9. File format : although most point and shoots produce jpg files, some are starting to produce RAW. Please read: “File Format”

10. Shutter Lag: Although this is a very difficult thing to determine, and manufacturers have clearly not agreed on a standard test so as to possibly publish a number we can all understand… it IS something you need to pay attention to. Please read:  “Shutter Lag”

Well, that’s the skinny, or not so skinny on how to buy a compact digital camera. I hope this posting helps as we enter the Christmas season. If you have any questions please feel free to write to me. If you want to learn how to use that camera check out this site: http://newyorkcityphotosafari.com/


Photo Tip #16: Camera Supports (aka tripods)

Posted: 05 October 2010 . / Categories: Photo Tips


I have been shooting for over 25 years, (i’m 30 ya know), and it was not until a couple of years ago did I bother to carry a tripod with me on a regular basis (and with that it’s only a mini table top model). I am a firm believer in hand holding my camera. I find that tripods and the alike just weigh down your bag with one more thing. That’s my 2 cents. But this post is about tripods so here it is.

When to use a tripod? There really is only 2 reasons to be using a tripod. 1. If you are shooting products in studio and need to do a lot of light adjustments. 2. You are shooting in low light alot (ie. night time photography or in side buildings)

How should you choose tripod legs? In the world of professional photography often tripods legs are sold separately from the head so let’s talk legs. They come in 2 flavors, the type with leg locks which twist or have flip levers. IMHO unless you are buying a Gitzo you should always buy legs with flip levers. With the exception of ones made by Gitzo, twist locks seem to go bad very quickly – and this is why Gitzo legs start at $350 new. With flip levers you can always readjust the nuts and bolts to ensure a tight lock. Aside from the levers, it just comes down to size. I think that the legs should be able to handle about twice as much weight as you anticipate having to put on them. It is preferable that it has the ability to extend taller than yourself; because let’s face it, often when you need a tripod it’s so that you can stabilize your camera into a position you can’t easily hand hold, and often that’s over your head. It is preferable that it is as light as possible especially if you plan on traveling with it. And if you are, make sure there is an easy way to attach a shoulder strap or to connect it to your bag.

What about the head? So what kind of tripod head should you buy? to go with your legs? Many many people like ball heads, because they seem so flexible and like it’s the right thing to do; you can twist it every which way and then just lock it in right? Wrong, if you are serious about using a tripod I would advise you get a “pan tilt” head; the reason for this is if you only need to make an adjustment in one direction, such as forward and back then you only release that mechanism. In the instance of a ball head, when you release the ball you are now moving in all directions, making small changes difficult. You actually get more control over your movements with a pan tilt head, albeit slower. Having said this, I do own a Manfrotto 484RC2 ballhead for my mini tripod; why? because it’s small and compact. I have regular pan tilt heads for my regular tripods. What about quick release?? I love quick release. It means that I can quickly dismount my camera from my tripod so that I can move the tripod easily without worrying about my camera. But if you are shooting in a studio, it really doesn’t matter as you will not be moving your equipment around all that much. Once you decide on the mechanics of the head which one to buy will again depend on how much weight you plan on putting on it.

What about a table top tripod or those new fangled Gorilla Pods? OK, this is an OPINION, and I am entitled to it. First the little Gorillapods by Joby are great! If all you are attaching is a point and shoot to these things work GREAT! I love them. So I bought the SLR version for my DSLR camera, and guess what? it sucks. It’s big and it would not hold, even the one they sent to replace it with did not work well; and my equipment was far lighter than it’s stated load capacity. My friend the engineer said, “Zim, this design never works well, under real world conditions. And if they did they don’t last very long. It’s a great idea that no one has been able to execute well.” If you need a small tripod I would suggest one of these:

Bogen Legs


Or I saw this on line recently but it’s $120, BUT it has a load capacity of 55 lbs!!! And the legs come out so it’s very transportable and small! It’s made by Novoflex.

Here is rule of thumb, if the tripod looks flimsy? IT IS! Good tripods don’t go bad and you can buy them on ebay used cheaper than retail and without worry. The cream of the crop tripods are made by Gitzo, which was bought by Bogen, which is now owned by Manfrotto – but a tripod sold under the Manfrotto name is still not a Gitzo; make sure it says gitzo if that’s what you want! And a 50 year old Gitzo? it’s still worth more than a new one.


Photo Tip #15: Understanding lenses (zoom and fixed)

Posted: 23 August 2010 . / Categories: Photo Tips


Remember Photo Tip #9? “Bigger is Not Better”? My advice here for the most part is the same… sort of. A lot of people ask me about buying these mongo zoom lenses like 18mm-300mm or something like that. The rule of thumb for YEARS has been, do not buy zoom lenses that are more than 2-2.5x. Why? because glass quality goes down. Below is an example.

Although the lens on the bottom has a much longer range it is literally 1/10 the price, about half the size, and 1/4 the weight . You have to wonder about this.  Why would they make such a behemoth of a lens for us pros to break our backs with? Here’s why, in order to get the lens quality that we demand along with great light gathering capabilities you have to put in a lot of glass and it has to be bigger to do it, and therefore the price goes through the roof.  So is bigger better? In this instance yes, but with qualifications. The physical size is bigger but the specifications are smaller (less zoom). This is often true with a fixed focal length (non zoom) lens too. * The bigger lens is also heavier and therefore more painful on your back.


Most of you are not buying DSLR’s so how does this relate to buying point and shoot cameras? Stay with me here, I’ll get to that.


The next question is what range is good for  you? Most people who take pictures on vacation or just day to day like to shoot landscapes, their personal environments and people at a very close range (like in the kitchen or living room), which means you really want a WIDE angle lens.  Speaking in 35mm equivalents**, IMHO I think if you can get something shorter than a 28mm lens you are doing well.  So what about the zoom? Again, IMHO I don’t think it matters. Just remember that the longer it is the bigger the camera. The point of a point and shoot is that it is compact and easy to carry; which means you’ll take it everywhere and actually take a few pictures! A point and shoot will pretty much never give you as much zoom as your imagination would like you to have so settle for less if it means that you will get a wider angle on the other end of the spectrum.


If you are buying a DSLR, you are likely doing it because you want to shoot some sporting events with your kids. Consider getting 2 lenses. A short zoom – like 24-70mm (35mm equivalent**), and a longer zoom 70-200mm (or even 300mm); these are the two that I carry, and they have served me well for 20 years! Just remember though, the longer the range the more likely the glass quality will go down.


*These days fixed focal length lenses are often referred to as “prime” lenses. I don’t know when that happened.


**35mm equivalent: this is what the result would look like if your camera has a full frame sensor or is a 35mm film camera. Most cameras are NOT full frame sensors and therefore have a “crop factor”; since it seems to vary from camera to camera to make sure that everyone is one the same page we talk in “35mm equivalent” so that we are comparing apples to apples. So when you are looking at two different cameras from two different manufacturers, you should ask what the 35mm equivalent is, because a 28-100mm on a Canon point and shoot may not the same as a 28-100mm on a Nikon and they would certainly not look the same if you mounted them on a full frame sensor camera. To do the conversion check out this website: http://www.digified.net/focallength/


Photo Tip #14: Color Space

Posted: 01 July 2010 . / Categories: Photo Tips


After all that talk about file format the next logical discussion is about color space. What is color space? Color space is how your camera decides to see the world. In other words, it’s color bias (yes everything is biased in the world, get over it). In the days of film, every manufacturer’s film biased differently; Kodak tended to bias towards the yellows and oranges while Fuji went towards the green.  To some extent color space works the same way… sort of. There are many different color spaces out there but typically it’s sRGB, RGB and ProRGB. RGB=red, green, blue; together you get all the colors in the spectrum. sRGB sees the smallest portion of the spectrum while ProRGB sees the largest.  You want to set your camera to shooting the largest, IMHO. Why? because you want to capture as much as possible for when you’ll be able to use it. HUH? what do I mean by that? Typically if you are taking your photo’s to a lab like, Walmart or CVS they are printing in sRGB. So even if you shoot in ProRGB, all of your colors will get truncated anyway. But hopefully, in the future this will change. In preparation for that eventual future I think you should be shooting in the biggest color space possible. You will also have a more lattitude to manipulate the image as well.


Having said this, most point and shoot cameras typically default to sRGB, you will want to look at your manual to change it.


This is a very very brief and simple explanation of color space but I think you get the idea


Photo Tip #13: File Format (jpg, tiff, raw)

Posted: 04 May 2010 . / Categories: Photo Tips


What? huh? FILE FORMAT. What type of file does your camera save your images in? and why is this important. You have to think of this in the same way we used to think of film. In the old days of film you had a few choices, negative or positive (slide) film, color or b/w. The latter question was generally a pretty straight forward question to answer. But the the former was pretty confusing to most people. Why would you choose negative film over slide film or vice verse. Well there were a lot of reasons, but suffice to say that most pro’s used slide film (other than your typical portrait or wedding photographer who shot negative). The reason often had to do with resolution and color. And the fact was that we could change our minds every 36 frames. In today’s digital age, what file format you shoot in is dictated by your camera (and some cameras let you change on the fly)

What’s the big difference in file format? The skinny is this. 1. jpeg (.jpg) files are small and compact and don’t hold a lot of information (so a lot of color information gets lost), 2. tiff (.tif) files are bigger than jpgs and can hold more information. 3. RAW files are considered the digital negative. It’s the native file that a camera produces. These are the largest files and are therefore capable of holding the most information. This is why all professional cameras shoot in RAW. There are now “prosumer” and point and shoot cameras that will shoot raw as well. So why don’t all cameras shoot in raw? The problem with raw is that it requires processing. You need special software to be able to read it and then translate it into another format so that others can view it; like jpg. Since there is more information to work with, there is also greater latitude to manipulate the image to get exactly what it is you want or thought you saw, rather than leaving the interpretive work up to the format. As great as RAW is, it’s not really for the typical shooter, because it means that you will need to do a lot of work to share it with  others, be it a print or on the in web. Further, there is not just one RAW format. Just about every camera that shoots raw, shoots in a proprietary format, and unless you have the latest update of whatever software you are using to process that file, you won’t be able do anything with it. Although, as far as I know, all cameras that shoot RAW also come with it’s own software to open that RAW file.

These are the reasons why most cameras shoot in jpg. It has been around for a long time, it seems to be universally recognized, it is small and portable, and contains just enough information for 90% of the photographers out there. Furthermore, most commercial printers (like CVS, Rite Aid, Walmart, Target etc.) want you to submit jpeg files anyway; which means if you are not already shooting in this format you will have to convert to it.


Photo tip #12 Shutter Lag.

Posted: 27 January 2010 . / Categories: Photo Tips


What’s “shutter lag” you ask? Shutter lag is the time it takes the camera to fire the shutter from the time you push the shutter button. In the early days of point and shoot digital cameras this was pretty bad. Although shutter lag times have shortened considerably, I am told that it will never go away with a point and shoot, and it still annoys the heck out of people.


So the question begs, “which camera have the shortest shutter lag times?” Well you can check out this website: http://www.cameras.co.uk/html/shutter-lag-comparisons.cfm . Although I think this is useful, I am not sure how the reviewer derived his numbers. So can you trust them? If this reviewer was using a constant measuring device the answer is yes. If not, then the table is useless. But you be the judge. Further, the manufacturers are NOT posting any numbers related to shutter lag. What they do post is the time from frame to frame. Seriously folks, who cares? Let’s face it, how many of us will be using our point and shoots to do high speed photography of any sort? How often will you be shooting junior or sparky run across the play ground?


Second question, “are there ways to overcome shutter lag?” The most common advice given is to “pre-focus”. One of the reason we get shutter lag is that the camera has to focus and then fire. So if press down the button halfway then it will focus without firing. And then when you are ready you can fire, and off it goes. Now this is only somewhat useful.  For the average point and shooter, we are shooting people standing still or an object standing still, so what’s the need for pre-focus? On the other hand we do often like to track junior crawling across the floor…. but that means that junior is moving right?  So where ever you had pre-focused on, is gone. So play with it and see if you can make that work, but I certainly have not figured that out. Honestly I just resort to my Digital SLR, no shutter lag.


Speaking of which, a D-SLR does not generally have shutter lag. They generally can track and object and continue to focus much much better than a point and shoot


Photo Tip #11 – Buying a Digital SLR

Posted: 09 November 2009 . / Categories: Photo Tips


Ok, ok, enough already! After posting Tip #9. People were feeling rather cheated because I had not really put up any advice regarding a Digital SLR. I basically pointed everyone towards getting a Ph. D (Push here dummy) type camera! For most of you it really is the right thing to do. But for those who are still not convinced here is my best advice for a digtial slr. First this is just an opinion, I would advise you do some real research into this yourself.

1. Again, consider what you really like to shoot and what you hope to do with the images! 2. Having settled that, let’s look at the options: plastic body or metal alloy body? For me I like to punish my equipment so I go for the metal body (they are also more expensive and weigh more). Mostly, plastic bodies are made for the amateur market and metal for the pro market. Consider that you are going to be carrying this around. 3. Full frame sensor or not. (full frame is more expensive) Full frame utilizes more of the glass that you are mounting on the camera and not just the center part of the the glass, therefore you need more expensive glass! 4. Ease of use, What do you get when you cross a computer with a camera? Answer, “A COMPUTER”. Look all digital cameras will require that  you read some part of the manual, I’ve now read FOUR, make that FIVE DSLR camera manuals front to back to make sure I got everything; this is no longer the days of film where a camera was a camera, was a camera. So you will have to consider, is this question, ” Is it easy to use?” If you shoot all the time, then you will get used to complicated user interfaces but if not, you will go nutty every time you use this complicated COMPUTER.


Photo Tip #10: Color and Contrast 10/09

Posted: 21 October 2009 . / Categories: Photo Tips


Fall is upon us and for those of us who live in places where the trees turn colors it is a great time to be outside taking pictures! This photo tip is about using color and contrast. As you look around for a great picture try to find colors that are striking. For the most part it’s easier to photograph vibrant colors than it is to photograph grey colors or earthtones, but that can work too. Fill up your viewfinder with these vibrant colors… all the way to the edges, then try moving in even closer. Try to get detail shots instead of wide open shots, because the further you back away, the more you will pull in other colors, thus taking away from the color that initially caught your eye. On the otherhand, can you create contrast with the colors that caught your eye? For instance, if there is one oak tree with red leaves in field of dark green pine trees you could very well benefit from backing away to show the pine trees because then they create more emphasis and contrast for the one red tree.


So the bottom line is to ask yourself, “what am I trying to capture and how are the colors helping me express that thought?”


This is a bit of a complex subject so questions are welcome


Photo Tip #9: Bigger is NOT better… camera advice.

Posted: 28 July 2009 . / Categories: Photo Tips


Many people like to ask me for advice on buying cameras and these days, I will be honest, it’s pretty hard to keep up with the latest and greatest. So I really don’t like to  recommend specific brands or models unless I just happen to be looking at them but there are some general guidelines that I like to share with those who call me looking for advice on a Single Lens Reflex (SLR) camera [a camera where you can change the lenses] First remember this “the bigger the camera the shorter the distance between you and the car”.

So before you go spending a lot of money on a big piece of equipment think to yourself what you really want to be doing with it and then consider how often you are going to be doing that. Plenty of people tell me they are going on a safari and want those National Geo shots of the tigers and they want to be able to do it for less than $350! faaahgetaboutit! and besides, how many times are you going to be doing that? So be practical. Get a small camera, a point and shoot. One that you will WANT to use all the time.

Okay okay, you are again thinking – where’s the advice??? 1. Optical Zoom is better than digital zoom (why? optical zoom is accomplished by the glass in the camera. Digital zoom is software which guesses what the image would look like if it had a longer zoom lens) 2. Buy as much megapixels as you can afford, but consider how big you most often enlarge your images to and buy enough megapixels to accomplish just a little bit more than that. 3. a large sensor can be more valuable than the number of megapixels – you’ll need to do a little digging to find out what the actual size of the sensor is for each camera. 4. A short zoom is generally better than a ginormous zoom; the glass quality usually drops with a longer zoom. 5. simplicity. Most cameras add more and more bells and whistles which you need to navigate around. Try to go with the simpler model. 6.Buy a nice big memory card!

If you have questions feel free to send me an email.


Photo Tip #8: I like lots of chips.

Posted: 12 May 2009 . / Categories: Photo Tips


In this age of digital phototography we are no longer carrying pounds and pounds of film but just a tiny itty bitty little memory chip. Although this is great and will help take pressure off of your back there are some drawbacks. The first, and seemingly not so obvious, problem is that it’s tiny! So what? so you can loose it that’s what! But you’re thinking Zim, “I only have one memory chip and it lives in my camera and it never comes out!” If that is the case then for the most part this problem wouldn’t worry you, however my tip is that you should carry 1-2 extra chips. “But Zim, my little chip is capable of taking 10,000 pictures!” Yes, this is true, but let me remind you that you are carrying a piece of electronic equipment which can fail on you at anytime for any reason. And that memory chip? It can do that too. So do you really want your entire trip to be held on one chip?

Then there is the other question, what if you loose that camera? if you do, all off the photos go with it. So you change your chip occassionally and put the used one in a safe place. But since it is sooo small you may want to put it in some sort of plastic case or wallet or something bright in color!

So big chip may not be the best thing to have because you have a greater risk of loosing more images. Lastly, backUP, backUP, backUP. Make sure you don’t just keep putting information on that chip. Be sure to burn it to a cd or a couple of hard drives.


Photo Tip #7: Save Everything!

Posted: 20 March 2009 . / Categories: Photo Tips


So most of us are shooting digital now. So most are shooting more images than they would have in the past, but there seems to be a tendancy to discard more images than we did in the past also. It’s just too easy. When pictures were negatives we discarded nothing. Now we just delete everything we don’t like and I think that’s a problem because I believe we are discarding our history. So save save save. Hard Drive space is cheap and getting cheaper by the second, so buy another and be sure back everything up too!


Photo Tip #6: Be Spontaneous!

Posted: 26 February 2009 . / Categories: Photo Tips


True, this little advice is being given to you by an anal retentive control freak, but alas I give it. BE SPONTANEOUS! Remember photo tip #4 about Uncle Arnie? Well this kind of advice goes along with that. What I’m asking you to do is to be spontaneous. Allow yourself to take photos that are blurry, sometimes it works out great. You can see a good example of this in my Thailand Monk photo click here . Sometimes you just need to react and take the shot. The best pictures of children and pets are just taken spur of the moment.

So relaaaax and JUST SHOOT ALREADY!


Photo Tip #5: My Camera has Enemies!

Posted: 09 January 2009 . / Categories: Photo Tips


If you ask any photographer, the two worst enemies of your camera are sand and water. Need I say more? So one of the worst things you can do is to take your camera to the beach! In this age of digital photography there really is nothing worse than getting sand and/or water in your camera. But if you do find yourself at the beach with a camera my only advice is to be careful. Bring a towel with you and keep the camera packed in the towel or in a plastic ziploc bag. Avoid people who are fooling around and throwing sand and water. And perhaps you should have considered that expensive zoom lens I recommended way back?

Also, there has been a popular urban myth that if you drop your equipment in salt water all you have to do is to soak it in fresh water? All I’m going to say is “For the LAST TIME, IT DOESN’T WORK!” If you drop your gear in water, any kind of water, only a sacrificial offering to the photo gods might work; and if it does please send me the details so I can post it! (and send the pictures documenting the sacrafice too!)


Photo Tip #4: Batteries?

Posted: 20 November 2008 . / Categories: Photo Tips


How often do people ask me to look at their camera and asked me to trouble shoot it? ya don’t want to know. I’m tellin ya, ya don’t wanna know. Sometimes they even ask about their camcorders too! Very often when people ask me to look at their non functioning camera it’s the battery. Ayup, the battery. So next time before you ask me, check your battery. So you’re thinkin’ to yourself, “gee Zim, thanks for tellin’ us you won’t help. That’s a GREAT photo tip!”

Well hold your horses, here’s the advice:
1. Carry a spare battery. If you are on a particularly long trip, consider NiMh or Lithium rechargeable batteries; but still carry an extra one. Make sure your charger works in the right voltage of your destination, like if you were traveling to Europe vs. Asia. If it is a really important trip (ie. life long dream vacation), make sure that the extra battery is reasonably new (under 3 months old) as these things do die with use and time.
2. If your batter fails, take the battery out, let it sit for about 15 seconds and put it back in – it actually works like magic.
3. If you failed to bring extra batteries or if you spent both of your batteries and chaos has ensued, try cleaning the contacts. The what? the contacts, the parts that touch the battery. If you can get a pencil with an eraser use the eraser to clean them otherwise just use your fingers or a t-shirt. Often the contacts will get dirty which prevents you from getting the last few minutes out of your battery or your camera won’t even see a new battery. Try cleaning the ends of your battery as well. This has worked for me 90% of the time in getting through that shoot. If that doesn’t work, well then you better find new batteries or recharge the one you got.

So ya think I might have dealt with this in Turkey last week? Good Luck!


Photo Tip #3: Forget about the Photos!!!

Posted: 18 September 2008 . / Categories: Photo Tips


Remember Uncle Arnie from No Wheresville who, for whatever reason, accompanied you and your family on that three day road trip to Vacation Hell in the heat of the summer? And he would insist on these family photos that would take a half hour to set up in front of that statue with the dead guy riding a horse while everyone melted under the blazing sun? And he had to use this crazy tripod and camera he had carried through the beaches of Normandy? So was it Uncle Arnie or was it your parents who did this?

It is from this type of experience that I advise everyone to more often than not: PUT THE CAMERA DOWN! Step away from the camera and forget about the pictures! Really you ask? Yes really. Most of us take pictures when we are out having fun; fun with our families or our friends; fun on vacation; fun hanging around the backyard. So why let the camera get in the way? Although a picture is worth a 1000 words, more often than not they ain’t and besides every story gets bigger and more elaborate by the year. So put the camera down and enjoy yourself!

********follow-up*********

There seemed to be some questions about post #2 – Move Back. Some of you just didn’t understand what I was talking about. The point was that you need to consider what you are taking a picture of. What’s the point of focus? Is it the statue or is it the people in front of the statue? Most of the time it shouldn’t be both. So sometimes you should move closer and at other times back. I can’t tell you when you should do what, but the point is you need to decide, this will help get you much better pictures! But remember what I just said above, sometimes you need to just step away from the camera!


Photo Tip #2: Move BACK!

Posted: 12 August 2008 . / Categories: Photo Tips


WHAT? doesn’t this contradict that last posting in June, you ask? No, here’s why. Again many people ask me about buying a zoom lens but the problem are as follows: 1. they don’t want to put out the money for a real zoom lens; and the cheap ones really don’t do the job right, 2. It’s just too big to lug that thing around everywhere; so people buy the thing and then end up leaving it at home. So then they are back to square one. In that last post I said “MOVE CLOSER” too often people are too far away when all they need to do is to take a few steps forward for a great photo.

BUT, and this is a big but. But, very often people will see something cool in the distance and they really want just that thing, BUT they don’t have that expensive zoom lens I recommended and further more they don’t have that hoover craft to get them there! So now what? STEP BACK AND CONSIDER THE WHOLE PICTURE! See the whole forest and make it work. I know this is easier said than done but… that’s my best advice.


Photo Tip #1: Move Closer 6/08

Posted: 18 June 2008 . / Categories: Photo Tips


First photo tip! Move CLOSER! Many people ask me to look at their photographs. Most do not solicit opinions because they really don’t want to know, but in my head I keep thinking to myself “MOVE CLOSER!” The most common mistake in day to day photography, including those dreaded vacation pictures, is that people are too far from their subject matter! Whether it’s candids of the children or that statue of the soldier on the horse! Take several big steps closer and you’ll be much happier with your photos. Never mind buying a zoom lens either. I mean get off your rear and move closer to your subject!

Back to top